Table of contents
User data in AWS
When you launch an instance in Amazon EC2, you have the option of passing user data to the instance that can be used to perform common automated configuration tasks and even run scripts after the instance starts. You can pass two types of user data to Amazon EC2: shell scripts and cloud-init directives. You can also pass this data into the launch instance wizard as plain text, as a file (this is useful for launching instances using the command line tools), or as base64-encoded text (for API calls).
User data and shell scripts
You can specify instance user data when you launch the instance. The User data field is located in the Advanced details section of the launch instance wizard. Enter your shell script in the User data field, and then complete the instance launch procedure. User data shell scripts must start with the #! characters and the path to the interpreter you want to read the script (commonly /bin/bash). Scripts entered as user data are run as the root user, so do not use the sudo command in the script. Allow enough time for the instance to launch and run the commands in your script, and then check to see that your script has completed the tasks that you intended.
If your script did not accomplish the tasks you were expecting it to, or if you just want to verify that your script completed without errors, connect to the instance, examine the cloud-init output log file (/var/log/cloud-init-output.log), and look for error messages in the output.
Task 01:
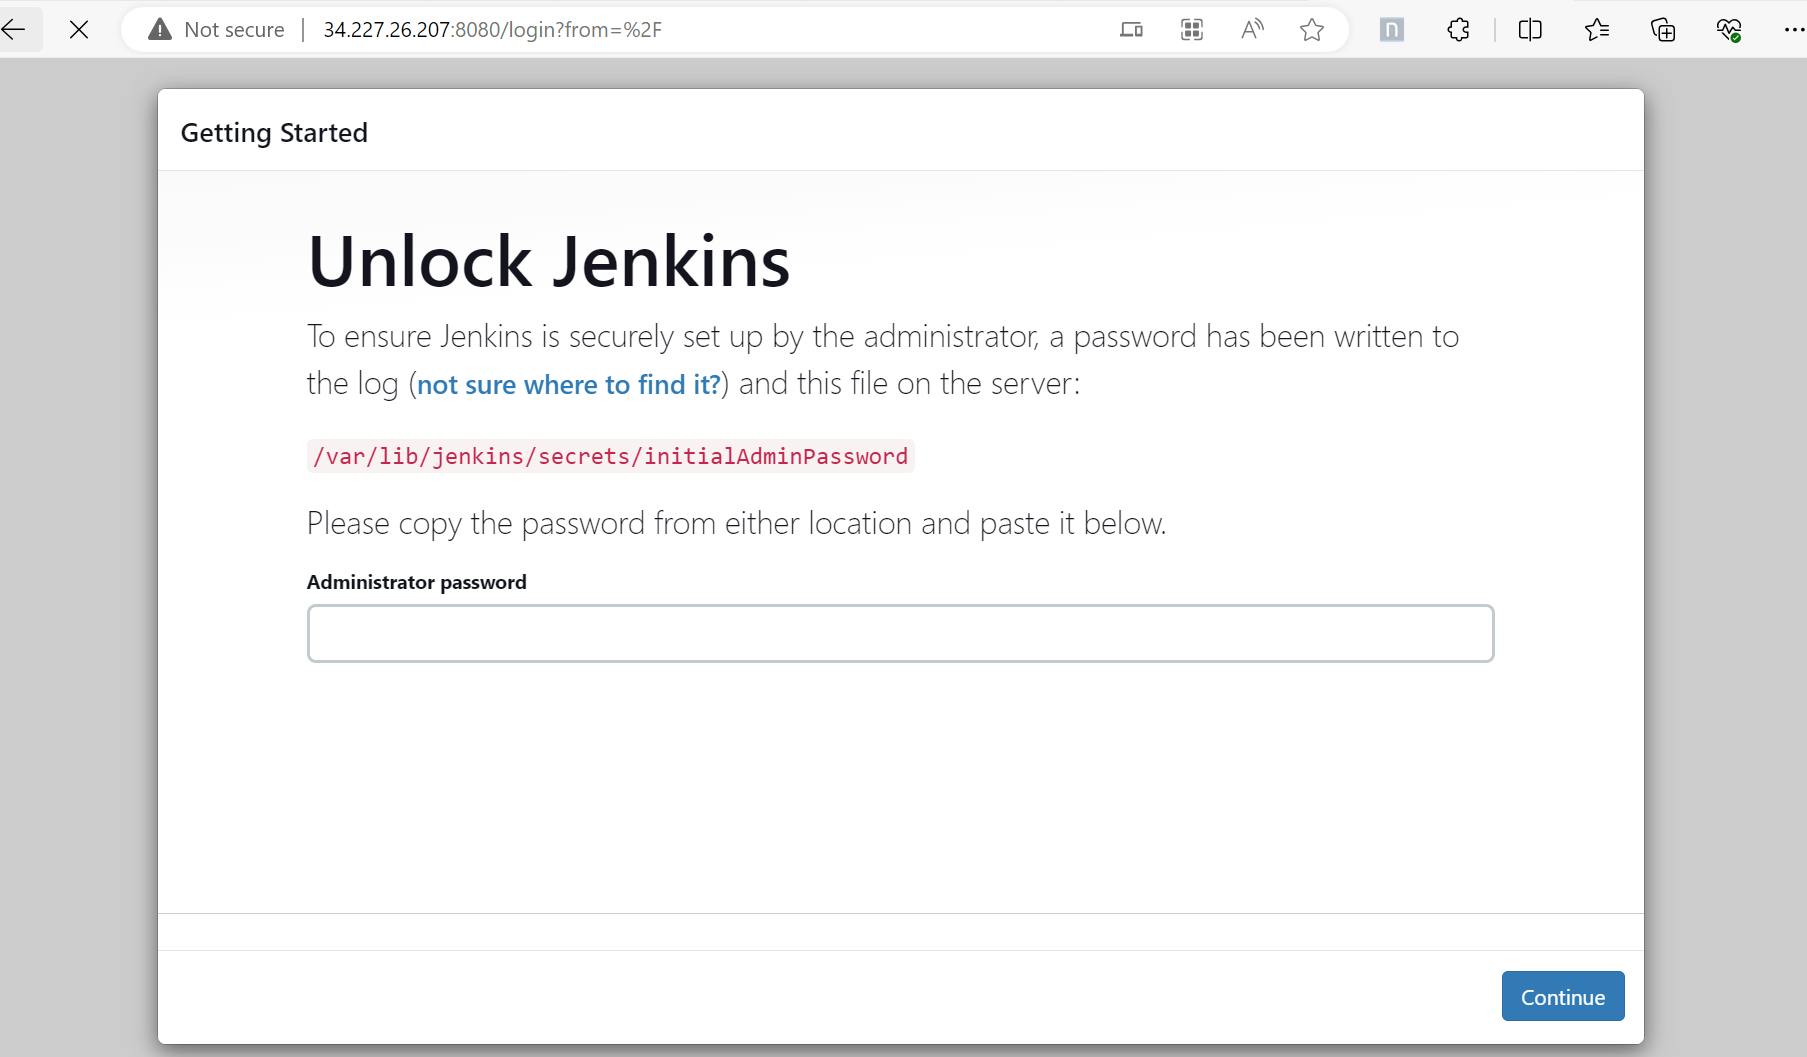
Launch EC2 instance with already installed Jenkins on it. Once server shows up in console, hit the IP address in browser and you Jenkins page should be visible.
Take screenshot of User data and Jenkins page, this will verify the task completion.
Steps to perform the above task:
Login to AWS Management Console and go to EC2 Dashboard.

Click on Launch Instance. Provide the instance name.

Select Ubuntu as the Amazon Machine Image.

Select Instance Type as t2.micro and key-pair value from the one stored in your local.

Configure the Network settings.

Expand Advance Details.

Scroll down to user data field

Enter the below code to install Jenkins on user data field and click on Launch Instance.
 #!/bin/bash
 sudo apt update
 sudo apt install fontconfig openjdk-17-jre
 java -version
 openjdk version "17.0.8" 2023-07-18
 OpenJDK Runtime Environment (build 17.0.8+7-Debian-1deb12u1)
 OpenJDK 64-Bit Server VM (build 17.0.8+7-Debian-1deb12u1, mixed mode, sharing)
 sudo wget -O /usr/share/keyrings/jenkins-keyring.asc \
   https://pkg.jenkins.io/debian-stable/jenkins.io-2023.key
 echo "deb [signed-by=/usr/share/keyrings/jenkins-keyring.asc]" \
   https://pkg.jenkins.io/debian-stable binary/ | sudo tee \
   /etc/apt/sources.list.d/jenkins.list > /dev/null
 sudo apt-get update
 sudo apt-get install jenkins

Go to Security Groups and edit the inbound rule to add port 8080 for allowing traffic for Jenkins

Copy the public IPV4 address and add port 8080 to access the Jenkins url.

Launch the Jenkins url: http://54.82.245.133:8080

The page is not loaded. Enter the command in your console to view the logs:
sudo cat /var/log/cloud-init-output.logRead the log and fix the issue. The issue was with '-y' missing from the command as it aborted the update.
Stop the running instance and edit the User Data by navigating to Actions -> Instance settings -> Edit user data.

Update the user data with the correct command and save the changes.
#!/bin/bash
sudo apt update -y
sudo apt install fontconfig openjdk-17-jre -y
java --version

sudo wget -O /usr/share/keyrings/jenkins-keyring.asc \
  https://pkg.jenkins.io/debian-stable/jenkins.io-2023.key
echo "deb [signed-by=/usr/share/keyrings/jenkins-keyring.asc]" \
  https://pkg.jenkins.io/debian-stable binary/ | sudo tee \
  /etc/apt/sources.list.d/jenkins.list > /dev/null
sudo apt-get update -y
sudo apt-get install jenkins -y

Launch the instance again and open the Jenkins url: http://34.227.26.207:8080/. User is able to launch Jenkins successfully.

.
Task 02:
Read more on IAM Roles and explain the IAM Users, Groups and Roles in your own terms.
Users: IAM Users are like personal accounts for people or applications that want to use Amazon Web Services (AWS). Each user has a unique username and password, and sometimes special access keys. These keys are like secret codes that let them access AWS resources securely. You can create, change, or delete users as needed. IAM users are individual accounts for accessing AWS resources, but they don't represent AWS accounts themselves; rather, they are accounts within your AWS account.
Groups: IAM Groups are collections of IAM users. It is used to organize users and manage permissions more efficiently. One can control access for multiple users at once by assigning permissions to a group. This simplifies the process because instead of setting permissions individually for each user, we can set them once for the group, and any user added to that group automatically gets those permissions.
Roles: An IAM role is like a special permission created in the AWS account. It's similar to an IAM user(AWS identity with permission policies) , but a role isn't just for one person – anyone who needs it can use it. Unlike users, roles don't have permanent passwords or keys. Instead, when someone uses a role, they get temporary permission to do specific tasks during their session. So, roles are flexible and temporary, allowing different people or services to access resources securely without needing permanent access.
Create three Roles named: DevOps-User, Test-User and Admin.
1. Login to AWS Console Management and search Roles from the top Search Bar.

2. Click on Create Role Button present on the IAM Dashboard.

3. Choose the appropriate use case for the role. Select "AWS Service".

4. Select EC2 and click on Next.

5. Select the Permission from the list of Permission Policies and click on Next.

6. Provide the Role name as "Devops-User"

7. You can view the Permssions in Permission Policy Summary Section. Now, click on Create Role.

8. Devops-User role is created successfully. It can be seen in the Roles dashboard.

9. Similarly, we can create the other roles "Test-User" and "Admin" and assign appropriate permissions to each role based on their respective responsibilities.
Thanks for reading!
Happy Learning!
